Knowing how rods actually get made in Heavyweight Fishing saves you a lot of wasted Gems. The game has a very narrow crafting system — only two craftable rods exist, both cost 50 Gems per attempt, and both carry a 50% failure rate — while every other "special" rod is either a quest reward, a banner roll, or a five-piece combination. The community information board collects every recipe and drop source in one place, and this guide walks through that data so you can plan your farm before you hand a single Gem to the Rod Seller.
The Two Craftable Rods in Heavyweight Fishing
Heavyweight Fishing does not have a separate crafting system or a per-tier recipe ladder. There is exactly one NPC — the Rod Seller — who accepts crafting attempts, and exactly two rods he can ever make. Anything sold on the regular rod ladder (Bamboo Rod through Grandmaster Golden Rod) is purchased outright with Cash and is not craftable, so you should never expect to "craft up" the way you would in other Roblox fishing games.
| Craftable Rod | Total Gem Cost Per Attempt | Failure Chance | Required Fish |
|---|---|---|---|
| Pure Diamond Rod | 50 Gems | 50% | Frost Kingfish, Frost Queen Fish, Sanguine Fish, Draconic Koi |
| Heaven Piercer Rod | 50 Gems | 50% | Flying Fish Empress, Flying Fish Emperor, Heaven Piercer Turtle, Rainbow Dragon Fish |
The board publishes no pity counter, no bonus success-rate mechanic, and no streak protection, so each attempt is a clean coin-flip once you have the four fish in your inventory. Players who report a "lucky streak" on Discord are describing small-sample variance, not a hidden system.
Why only two craftable rods exist
The closed crafting list is a deliberate design choice. Every other top-tier rod in the game is gated behind a different progression system: the Spine and Gravity families (Steel Spine, Golden Spine, Platinum Spine, Diamond Spine, Gravisteel, Auric Gravity, Inferno Gravity, Cryo Gravity) are Cash purchases, the Thorn and Starlight lines (Thunder Thorn, Soul Thorn, Starlight) are banner-exclusive, and the Maoshan Rod ties into a quest chain. Crafting is reserved for the two rods whose identity is built around secret-fish ingredients, which is also why their recipes read like a trophy list.
The 50-Gem Cost and 50% Failure Rate Explained
Both crafting attempts charge 50 Gems whether they succeed or fail. If the roll misses, you keep nothing — the Gems are spent, and the four fish you submitted are consumed. This is the single most important number in any rod crafting guide, because it sets your expected Gem cost at 100 Gems per successful rod (50 × 2 attempts on average) plus the value of the fish you lose on failed rolls.
| Outcome | Gem Cost This Attempt | Fish Cost | Net Result |
|---|---|---|---|
| Success | 50 Gems | 4 fish consumed | You receive the rod |
| Failure | 50 Gems | 4 fish consumed | Nothing returned, attempt lost |
| Average over many rolls | 100 Gems | 8 fish consumed | One rod crafted |
Players sometimes ask whether the Rod Seller takes Gems first or fish first; the community information board treats Gems as the flat entry fee and the four fish as the material list, so plan your inventory in that order. The board also does not list any buff, item, or event that lowers the failure rate, so treat 50% as a fixed cost rather than something you can optimise away.
Pure Diamond Rod Recipe and How to Farm Each Ingredient
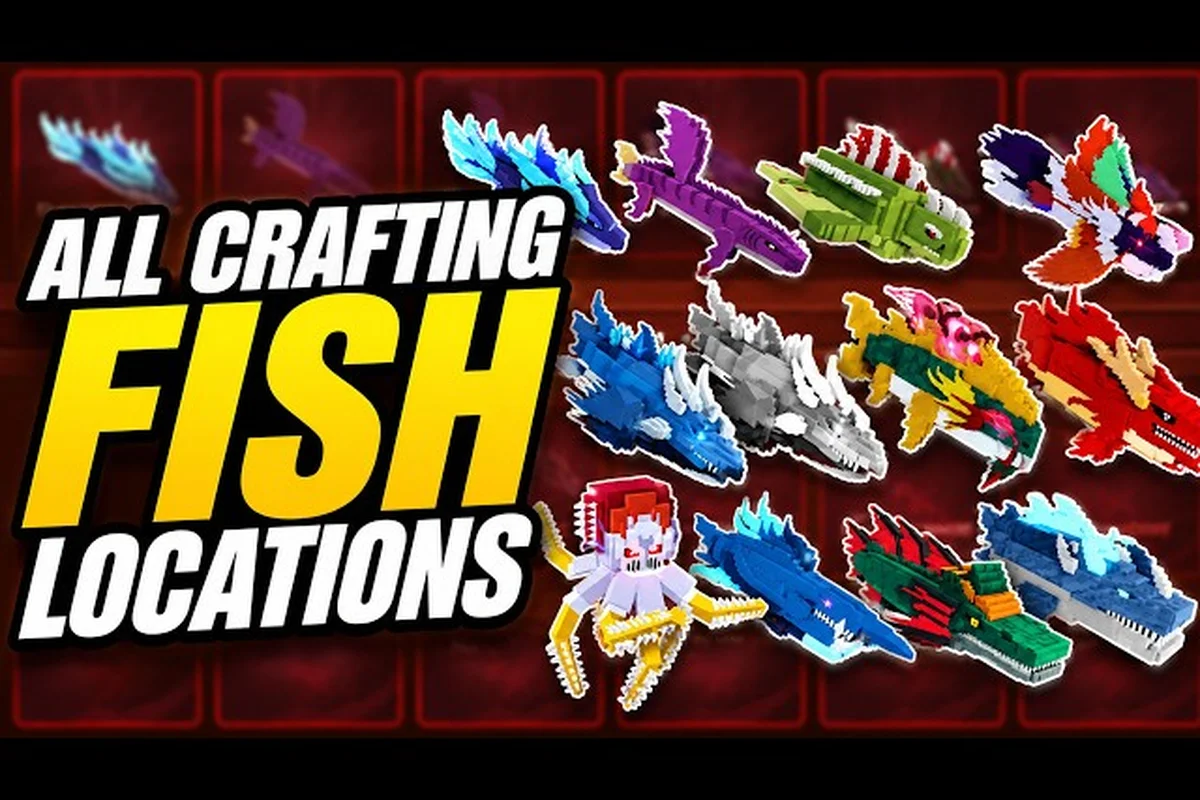
The Pure Diamond Rod is the lower of the two craftable rods in the gate, and it is also the one most players attempt first because three of its four ingredients can be caught before you ever leave the early islands. The recipe is 1 Frost Kingfish, 1 Frost Queen Fish, 1 Sanguine Fish, and 1 Draconic Koi. None of them are craftable, and none drop from the standard fish pool — they are all secret fish with specific island and weather conditions attached.
| Ingredient | Type | Practical Source (Community Data) |
|---|---|---|
| Frost Kingfish | Secret fish | Frost Isle rotations, cold-weather windows |
| Frost Queen Fish | Secret fish | Late Frost Isle content, paired with the Kingfish cycle |
| Sanguine Fish | Secret fish | High-tier island encounters, blood-themed events |
| Draconic Koi | Secret fish | Top-tier secret pool, rare spawn rate |
The board does not publish exact drop percentages or respawn timers for any of these fish, so any "X% drop" figure you see in a YouTube guide is player estimation. Treat each ingredient as a long farm rather than a guaranteed catch, and bank extras of the cheaper ones (Sanguine Fish and Draconic Koi) before you queue a craft. The community information board tracks the latest known spawn locations for these secret fish and is worth bookmarking if you intend to attempt the recipe more than once.
Recommended farming order
A practical order for new crafters is to push toward Frost Isle first, because it is the only island that hosts two of the four ingredients in one rotation. Land the Frost Kingfish and Frost Queen Fish pair, then pivot to whatever island currently surfaces Sanguine Fish and Draconic Koi. Bringing the right bait matters here: Frost Bait is the only bait in the published list that buffs cold-water catches, so swap it in for the Frost Isle leg of the farm.
Heaven Piercer Rod Recipe and Why It Costs More to Attempt
The Heaven Piercer Rod is the second craftable rod and is functionally a "prestige" craft because every ingredient is a top-tier secret fish with no early-island source. Its recipe is 1 Flying Fish Empress, 1 Flying Fish Emperor, 1 Heaven Piercer Turtle, and 1 Rainbow Dragon Fish. The Gem cost and failure rate are identical to the Pure Diamond Rod (50 Gems, 50% chance), but the fish grind is several times longer.
| Ingredient | Type | Approximate Difficulty (Community) |
|---|---|---|
| Flying Fish Empress | Secret fish | High-tier aerial encounter |
| Flying Fish Emperor | Secret fish | High-tier aerial encounter, paired with the Empress |
| Heaven Piercer Turtle | Secret fish | Boss-tier secret fish |
| Rainbow Dragon Fish | Secret fish | Rarest ingredient in the recipe |
The Heaven Piercer Rod shares its name with one of its ingredients (the Heaven Piercer Turtle), and the rod itself is the only craftable piece in the game that drops a similarly named catch. This is not coincidence — the rod is themed around the secret-fish set you spend to build it, which is why community trackers often list the Heaven Piercer Rod as a "flex" craft for players who have already completed most other progression.
When it is worth attempting
Because each failed Heaven Piercer craft costs 50 Gems plus four of the rarest fish in the game, most players do not attempt this rod until they have a stockpile of at least 8–10 of each ingredient. The community information board does not publish a pity mechanic, so the only way to lower your per-rod cost is to wait for ingredient surpluses and then craft in batches. If you only have a single set of ingredients, sit on it until a second set is in the bank.
Rod Skins, Banners, and the AWK Kraken Rod
Rod skins in Heavyweight Fishing are cosmetic variants and are not part of the crafting pipeline. The community information board separates them into three buckets: banner-rolled skins, the special AWK Kraken Rod, the Giang Lao quest reward, and the daily-login reward. Knowing which is which matters because the only skin in the game that has a "crafting" requirement of any kind is the AWK Kraken Rod, and even that is a five-piece combination rather than a Gem-based craft.
| Rod Skin | How to Obtain | Craftable? |
|---|---|---|
| AWK Kraken Rod | Combine 5 Kraken Rods | No (combine-only) |
| AWK Taiji Twin Scythe | Banner roll variant | No |
| Taiji Twin Scythe | Egoless Banner, Celestial Banner | No |
| Kraken Rod | Egoless Banner, Celestial Banner | No |
| Divine Spear Rod | Egoless Banner, Celestial Banner | No |
| Wisteria Caster | Egoless Banner, Celestial Banner | No |
| Demonic Rod | Egoless Banner, Celestial Banner | No |
| Lifebloom Rod | Egoless Banner, Celestial Banner | No |
| Anchorbound Rod | Egoless Banner, Celestial Banner | No |
| Sacred Bamboo Rod | Giang Lao quest line | No |
| Specter's Chainsaw | Daily-login reward | No |
Notice that none of these are produced by the Rod Seller, and the board does not publish a Gem fee for the AWK Kraken Rod combination. If a guide tells you there is a "combine cost" to merge five Kraken Rods, that number is invented — the only known requirement is the five rods themselves. y the Rod Seller, and the board does not publish a Gem fee for the AWK Kraken Rod combination. If a guide tells you there is a "combine cost" to merge five Kraken Rods, that number is invented — the only known requirement is the five rods themselves, and for a broader look at how the Kraken Rod stacks up against other endgame options you can check our Heavyweight Fishing best rods ranking before committing your five copies.
How banners actually work
Both the Egoless Banner and the Celestial Banner are the published sources for seven of the eleven skins, and they share the same drop pool: Taiji Twin Scythe, Kraken Rod, Divine Spear Rod, Wisteria Caster, Demonic Rod, Lifebloom Rod, and Anchorbound Rod. The two AWK variants (AWK Kraken Rod, AWK Taiji Twin Scythe) appear to be upgraded tiers of existing rolls, while Sacred Bamboo Rod is locked to the Giang Lao quest chain and Specter's Chainsaw is a daily-login reward. This means the "best" rod skin for most players is whichever banner is currently active, not whichever skin has the highest stat sheet — skins are cosmetic and do not modify Luck or Power.
The AWK Kraken Rod combination
The AWK Kraken Rod is the only skin that has a hard prerequisite count, and that prerequisite is exactly five Kraken Rods. Because the Kraken Rod itself is a banner drop, the path to AWK is straightforward: roll Kraken Rod five times across the Egoless or Celestial banner, then trigger the combination. The community information board does not list a Gem cost or a cooldown for the combine, so plan to do it as soon as your fifth Kraken Rod lands. For players who already have a Kraken Rod in the bank, the Heavyweight Fishing kraken rod grind is really a banner RNG grind rather than a resource grind, and the real bottleneck is banner pity rather than Gems.
How to Earn Gems and Fish Without Wasting Inventory
The two resources that gate every craft are Gems and secret fish, and they come from completely different loops. Gems are the rare currency that you earn slowly from event participation, ticket exchanges, and high-tier catches, while secret fish are gated by island, weather, and bait. The community information board treats them as separate resource tracks rather than a single "crafting currency," which is the right mental model.
| Resource | Primary Source | Common Mistake |
|---|---|---|
| Gems | High-tier catches, ticket exchanges, event rewards | Spending on rod ladder purchases instead of saving for 50-Gem crafts |
| Secret fish | Weather-locked island rotations | Catching during the wrong weather, then losing the fish to a failed cast |
| Banner pulls | Egoless Banner, Celestial Banner | Rolling without a target skin in mind |
A good rule of thumb is to keep a Gems buffer of at least 200 before attempting any craft, so you can absorb one full failure and still retry. New players often blow their entire Gem balance on the first Pure Diamond Rod attempt, get the 50% fail, and then have nothing left to try again — which is the single most common reason a "casual" crafter never actually finishes a rod.
Common Mistakes Players Make on the First Craft
Every beginner who walks into the Rod Seller for the first time falls into at least one of the same handful of traps, and most of them are about the failure rate rather than the recipe. The community information board flags a few patterns that show up repeatedly in player reports, and they are worth memorising before you queue your first attempt.
-
Submitting the four fish without checking the 50% fail rate. The single biggest mistake; half of all first attempts end with no rod and a lost set of ingredients.
-
Assuming a separate crafting system exists. There is none; the Rod Seller is the only entry point.
-
Confusing banner skins with craftable rods. The Kraken Rod and its AWK variant are banner drops, not Gem crafts.
-
Spending Gems on regular ladder rods (Grandmaster Steel, Grandmaster Emerald, etc.). Those rods are Cash purchases and offer no path toward a craftable end-game piece.
-
Treating secret-fish drop rates as fixed. The board publishes no drop rate, so do not budget around a "guaranteed in N casts" assumption.
-
Forgetting to equip Frost Bait when farming Frost Isle ingredients. Frost Bait is the only published bait that buffs cold-water catches.
If you internalise just two of these — the 50% fail rate and the no-bench rule — you will already be ahead of most first-time crafters. Everything else on the list is optimisation.
Frequently Asked Questions
How many Gems does it cost to craft a rod in Heavyweight Fishing?
Every craftable rod attempt in Heavyweight Fishing costs a flat 50 Gems, regardless of whether the roll succeeds or fails. Because each attempt also has a 50% failure rate, the expected Gem cost to land a single rod is around 100 Gems, not counting the four fish that are consumed either way.
What fish do I need to craft the Pure Diamond Rod?
The Pure Diamond Rod requires 1 Frost Kingfish, 1 Frost Queen Fish, 1 Sanguine Fish, and 1 Draconic Koi. All four are secret fish with no craftable source, so you need to catch them at the right island and weather before the Rod Seller will accept the attempt.
Can I craft rod skins like the AWK Kraken Rod?
No rod skin is craftable in Heavyweight Fishing. The AWK Kraken Rod is a combination of five regular Kraken Rods rather than a Gem recipe, and the other skins (Taiji Twin Scythe, Divine Spear Rod, Wisteria Caster, Demonic Rod, Lifebloom Rod, Anchorbound Rod) drop from the Egoless or Celestial Banner. Sacred Bamboo Rod is a Giang Lao quest reward, and Specter's Chainsaw is a daily-login reward.
Is there a separate crafting system in the game?
There is no separate crafting system and no per-tier recipe ladder in Heavyweight Fishing. The only place you can attempt a craft is the Rod Seller NPC, and the only two craftable rods in the entire game are the Pure Diamond Rod and the Heaven Piercer Rod, each at 50 Gems per attempt with a 50% failure rate.
How do I get more Gems to afford crafting attempts?
Gems come from high-tier catches, ticket exchanges, and event participation rather than from regular fish sales. The community information board does not publish a fixed Gem-per-hour rate, so plan around slow accumulation and keep a buffer of at least 200 Gems before queueing your first craft so that one failed attempt does not lock you out of a retry.